Help Brilion Help Brilion

  • Home
  • Magazine
  • Help Center
Home / Scheduling / Allocating Driver Zones

Allocating Driver Zones

5 views Less than a minute 0
  • Please head over to Settings > Zones > Your Desired Zone by clicking on the zones name.
  • Click on the driver that will be allocated to the particular zone from the list on the left.
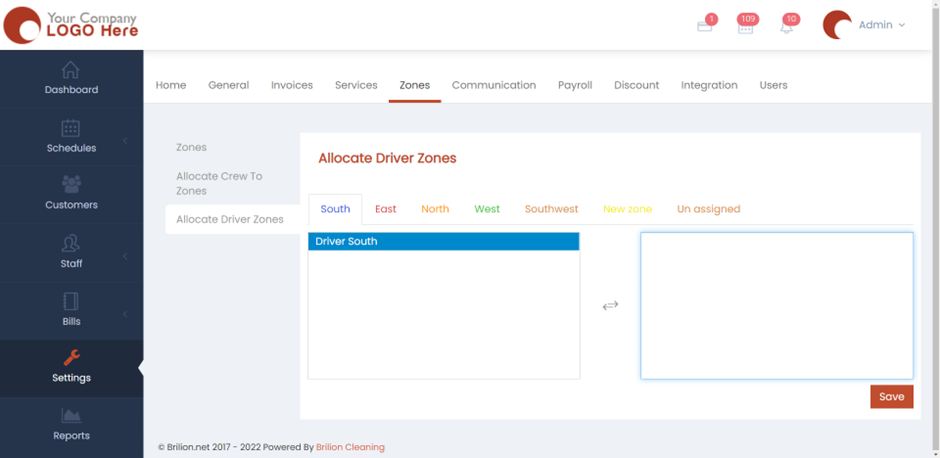
  • By clicking on their name, they will move to the right. This means that they’re now allocated to your desired zone.
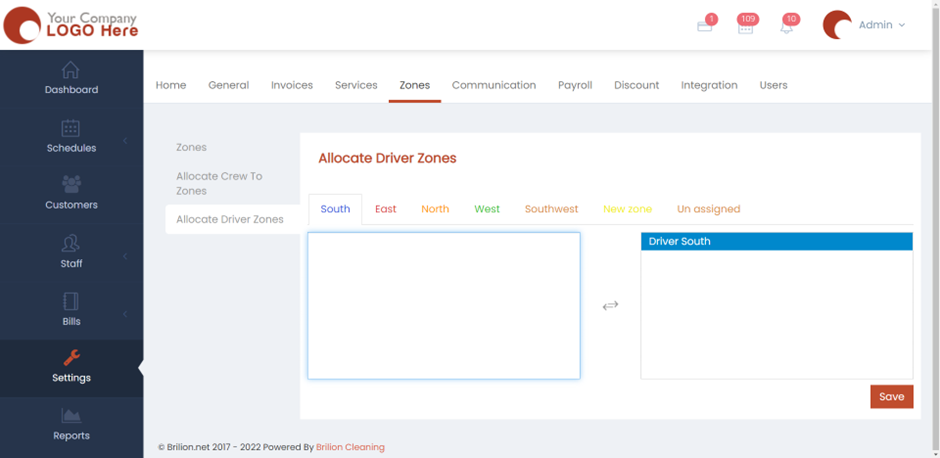
  • Click on “Save” and the driver will now be allocated to that particular zone.


Scheduling

About info

View all posts by info →

Related Articles

  • Setting time slots for online booking
  • Marking a customer active/inactive
  • Enabling today and future days booking notifications for your crews
  • Deleting a receipt in case payment is not made/ Recovering an invoice

Categories

  • 14Communications
  • 8Crew App
  • 2Customer App
  • 25Getting started
  • 5Integrations
  • 9Invoices and Payments
  • 1Marketing
  • 13Online Booking
  • 29Scheduling

Most Viewed

  • Add multiple jobs for a single customer on the same day 9
  • Adding a note that appears on every job 7
  • Deleting or adjusting an invoice 6
  • Allocating Driver Zones 5
  • Adding a crew member and generating password for the crew app 4

Most Liked

© 2024 , Brilion Technologies | All Rights Reserved | Privacy Policy | Terms & Conditions